Rankings
Top 25 Elden Ring Bosses Ranked by Difficulty
Elden Ring features one of the most brutal boss rosters in any FromSoftware game, with over 80 unique encounters spread across the Lands Between. This ranking covers the 25 most significant bosses based on difficulty, moveset complexity, and the challenge they present at the point in the game where most players encounter them. Each entry includes difficulty rating, key attacks to watch for, location, boss type, and an analysis of what makes the fight memorable. Rankings account for both initial playthrough difficulty and NG+ scaling potential, focusing on solo no-summon encounters where boss AI is most predictable.

Malenia, Blade of Miquella
Elphael, Brace of the Haligtree
Malenia is the hardest boss in Elden Ring by a wide margin. Her Waterfowl Dance combo is one of the most punishing attacks in gaming history — three consecutive flurries that track the player across the arena and require frame-perfect dodge timing or specific bloodhound step positioning to survive. Her Great Rune healing effect means she recovers health on every hit, punishing shields and trading strategies equally. The second phase transforms her into the Goddess of Rot, adding scarlet rot explosions, phantom clone attacks, and a flower bomb that covers half the arena. Malenia demands mastery of every combat mechanic FromSoftware has ever designed, and even then, RNG can end a perfect run in seconds.

Maliketh, the Black Blade
Crumbling Farum Azula
Maliketh's second phase is the most aggressive fight in Elden Ring. His Black Blade reduces maximum HP on each hit, preventing flask recovery from restoring the full bar and forcing perfect avoidance. He leaps across the arena in massive arcs, leaving trails of destined death that linger and punish greedy healing. The first phase Beast Clergyman is a warmup with projectile spam and quick melee combos, but phase two transforms Maliketh into a flying death machine with the Claw and Sword combos that cover vertical and horizontal space simultaneously. His health is relatively low for a endgame boss, which creates a high-risk high-reward dynamic — kill him fast or die.
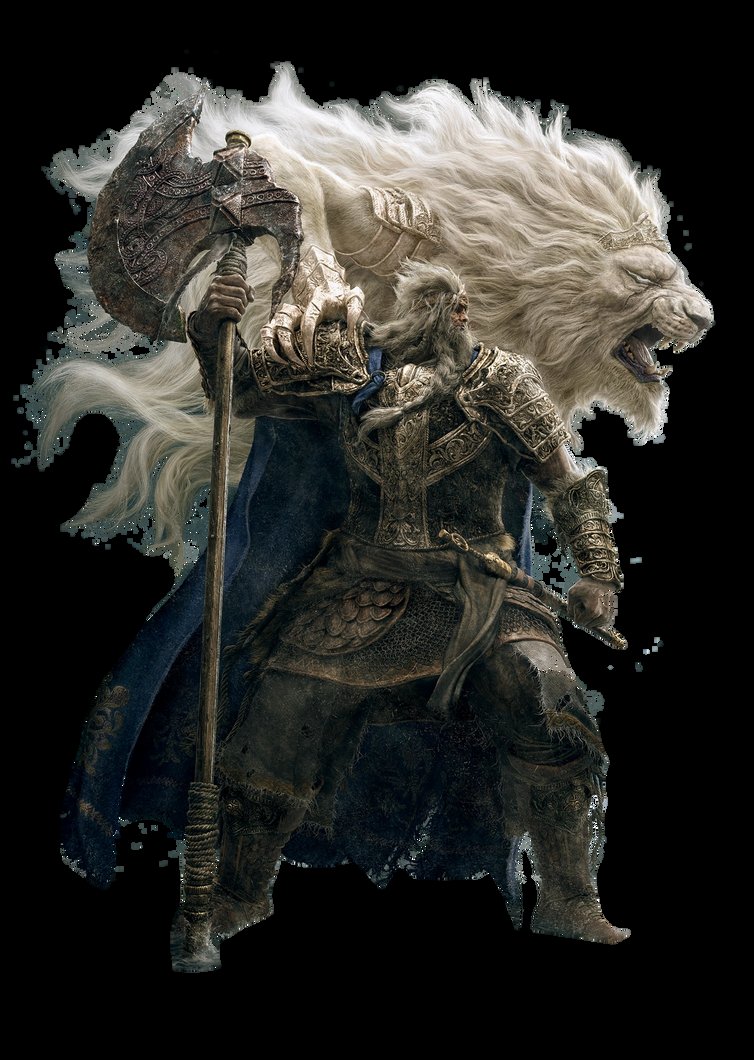
Godfrey, First Elden Lord / Hoarah Loux
Leyndell, Ashen Capital
Godfrey is a pure physical brawler with no magic or gimmicks — just raw strength and aggression. His first phase uses an axe with wide sweeping arcs and ground-shaking stomps that create area denial shockwaves. The second phase sheds all pretense of royalty as Hoarah Loux, Warrior, starts grabbing the Tarnished for devastating wrestling moves that cannot be blocked. His Earthshaker combo and repeated grabs demand precise roll timing and punish panic rolling harder than any other boss. Unlike most late-game bosses, Godfrey has no elemental weaknesses to exploit — the fight is a pure skill check on dodge timing, stamina management, and knowing when to retreat.
Mohg, Lord of Blood
Mohgwyn Palace
Mohg presents a unique challenge with his Nihil curse mechanic that forces players to heal through three massive damage ticks or die. His NIHIL! chant triggers a phase transition that deals unavoidable damage, and without the Purifying Crystal Tear, requires precise flask management to survive. Mohg's bloodflame attacks cover large areas with lingering damage zones, and his trident reach is deceptively long. The second phase adds flame wings that extend his hitbox and create fire trails on every swing. Mohg punishes passive play aggressively, forcing players to stay close and maintain pressure while managing NIHIL timings — a dance between offense and survival.

Starscourge Radahn
Redmane Castle, Caelid
Radahn's festival fight is a spectacle of scale unmatched in the game. His opening arrow volley can one-shot players caught in the open, and the transition from bow to gravity swords creates a massive shift in threat range. The second phase sees him launch into the sky and crash down as a meteor, an attack that covers the entire arena and kills instantly. His gravity magic pulls players in for combo follow-ups, and the aggressive leaping slams make terrain awareness critical. Post-patch Radahn is more balanced than the launch version but still demands respect — his damage output and arena-wide AoEs punish anyone who treats this as a gimmick fight.

Dragonlord Placidusax
Crumbling Farum Azula (Hidden Arena)
Placidusax is an optional endgame dragon boss hidden behind a teleporter in Farum Azula. His massive scale and arena-wide lightning nukes create a fight where positioning is more important than reflexes. Phase one tests the player's ability to read dragon tells — claw swipes, tail sweeps, and breath attacks from multiple heads. Phase two introduces a three-stage lightning storm that follows the player across the arena, forcing constant movement. The golden lightning spears and beam attacks in phase two cover the entire arena, demanding perfect dodge timing. Placidusax can also disappear and reappear for surprise attacks, keeping pressure high throughout the fight.
Godskin Duo
Crumbling Farum Azula
The Godskin Duo is a gank fight that combines the Apostle's slow heavy hits with the Noble's fast rolling attacks. Both enemies share a resurrection mechanic — unless both are killed within a short window, the surviving one revives the other. The pillar-filled arena offers cover from the Noble's fireball and the Apostle's black flame, but the cramped space makes positioning a constant challenge. The Apostle's long reach and the Noble's belly flop attack create overlapping threat zones that force split-second decisions. Sleep pots can trivialize one of them temporarily, but without that preparation, this is one of the most demanding multi-boss fights in the game.
Morgott, the Omen King
Leyndell, Royal Capital
Morgott has the most varied moveset of any boss in Elden Ring, with combos that mix holy weapons, curved swords, hammer strikes, and his signature cursed blood attacks. He creates holy weapons on demand — spears, swords, and hammers that extend his reach and change hit timing mid-combo. Morgott never stops moving, chaining attacks with minimal recovery frames and punishing flask usage aggressively. His second phase adds area-of-effect holy explosions and a devastating jumping slam combo. Morgott is often fought slightly under-leveled since Leyndell can be reached early, making his damage output feel disproportionately high for a mid-game boss.

Fire Giant
Mountaintops of the Giants
The Fire Giant is a massive health pool boss with two distinct phases and arena-wide destruction. His shield in phase one forces players to attack his weak leg, requiring aggressive positioning between his stomps. The fire breath attacks cover massive ground area and the shield slam creates shockwaves that stagger and punish close-range builds. Phase two removes the leg restraint but adds rolling fireballs, flame pillars from the ground, and a meteor attack that tracks the player across the snowy arena. The sheer size difference makes camera management a constant battle, especially for melee builds trying to stay behind him.
Godrick the Grafted
Stormveil Castle
Godrick is the first major shardbearer most players encounter, and his multi-phase fight serves as a brutal gatekeeper for Limgrave. His first phase uses a massive battle axe with sweeping combos and a wind-up delay that catches early-timers. The phase transition cutscene where he grafts a dragon head onto his arm is one of the game's most iconic moments. Phase two adds fire breath and a long-range gap closer that can one-shot low-vigor builds. The arena pillars provide cover but also limit movement, and Godrick's attack chains can trap players in corners. For new players, Godrick is often the first wall that forces adaptation beyond basic rolling.

Rykard, Lord of Blasphemy
Volcano Manor
Rykard is a gimmick fight in the Storm Ruler tradition — the Serpent Hunter weapon found in the arena is required to deal meaningful damage. The first phase against the God-Devouring Serpent tests positioning against sweeping attacks and poison breath. Phase two reveals Rykard himself fused with the serpent, unleashing lava floods, skull projectiles, and a massive sword that creates fire shockwaves across the arena. The weapon art timing is essential: charging the Serpent Hunter's wind projectile at the right moment staggers him and creates openings. Despite the gimmick, Rykard's second phase attacks can kill in two hits, keeping pressure high.

Rennala, Queen of the Full Moon
Raya Lucaria Academy
Rennala's fight is split between a puzzle-like first phase and a high-magic duel in phase two. Phase one requires finding the golden-accented book-bearer among the chanting scholars to break Rennala's shield, repeated three times. The fight is more about target prioritization than combat skill. Phase two transforms into a magic duel where Rennala summons wolves, giants, dragons, and even her own students as spirit projections to fight alongside her. The full moon attack covers a massive area and removes all buffs on contact. Magic users face a particularly tough time here since Rennala has high magic resistance, forcing melee approaches or rock sling spam.
Lichdragon Fortissax
Deeproot Depths
Fortissax is an optional dragon boss found in Deeproot Depths as part of Fia's questline. The fight uses a modified version of the ancient dragon moveset with death lightning added for area denial. Fortissax's lightning attacks create ground-trailing AoEs that force constant repositioning, and the death blight buildup adds a status effect threat that punishes staying in place. The dragon's claw swipes and tail sweeps cover a wide arc, but the real challenge comes from the lightning spears that rain down from above while Fortissax attacks from the front. The arena is relatively flat but has limited space compared to open-world dragon fights, reducing escape options.

Astel, Naturalborn of the Void
Grand Cloister (Lake of Rot)
Astel is a cosmic horror boss with teleportation, gravity magic, and a massive sweeping tail that covers half the arena. It frequently teleports behind the player for grab attacks that deal massive damage and reposition both combatants. The gravity meteor shower creates a carpet of explosions that require sprinting sideways rather than rolling. Astel's arena is a floating crystal cave with limited edges, and the boss's habit of backing up between combos forces constant chasing. The Nebula attack fires a spread of projectiles followed by a delayed explosion, punishing players who dodge too early. Staggering Astel is effective but requires aggressive pressure through its teleportation.

Commander Niall
Castle Sol
Commander Niall's difficulty comes primarily from his two summoned spirit knights that must be dealt with before the commander becomes aggressive. The dualsword knight is fast and aggressive while the shield knight provides covering fire. Once alone, Niall uses lightning-inflected halberd combos with delayed strikes designed to catch panic rollers. His phase two adds a lightning stomp that creates a massive AoE and flying kicks that close distance instantly. Niall is an optional boss guarding one half of the Haligtree medallion, which means many players fight him at lower levels than intended, inflating his perceived difficulty beyond his actual moveset complexity.
Crucible Knight Ordovis
Auriza Hero's Grave
Ordovis is a double boss fight featuring two Crucible Knights in a confined arena. The spear-and-shield knight is aggressive with gap-closing lunges while the greatsword-wielding Ordovis uses sweeping horizontal combos with delayed overhead slams. The tight arena makes separating them extremely difficult, and both knights have the Crucible tail swipe punish for anyone trying to heal behind them. Ordovis's signature attack is the Ordovis's Vortex — a spinning greatsword combo that covers 360 degrees and launches multiple times. Parrying is effective but risky since missing a parry against either knight means eating a full combo. This fight is a wall for players who rely on passive play.

Valiant Gargoyles
Siofra Aqueduct
The Valiant Gargoyles fight starts as a single enemy and escalates to a 2v1 when the second gargoyle joins at 60% health. Both gargoyles share the same moveset — twinblade sweeps, overhead slams, and a poison breath attack that covers a large area in front. The arena is a small platform with a deadly waterfall drop on one side, creating environmental danger alongside the boss threat. The second gargoyle's poison breath can overlap with the first one's melee combos, creating a deadly crossfire. High damage output is the best strategy here — killing the first gargoyle before the second one fully aggros makes the fight significantly more manageable.

Draconic Tree Sentinel
Capital Outskirts (Leyndell Gate)
The Draconic Tree Sentinel guards the entrance to Leyndell and serves as a mounted combat skill check. His horse allows him to close distance instantly, and his fireball attacks punish players who try to fight at range. The flail combos have deceptive range and timing, with the second swing often arriving later than expected. His phase two adds dragon lightning strikes from above that create ground AoEs, forcing constant movement. The shield bash can break guard stance in one hit, making blocking unreliable. The fire breath attack sweeps in a wide arc and can catch players trying to circle behind. Poison or rot effects work well here since the Sentinel has no status immunity.

Loretta, Knight of the Haligtree
Haligtree Town
Loretta is a mounted magic knight who combines aggressive sorcery with sweeping halberd attacks from horseback. She opens with a volley of glintstone pebbles followed by a charge, punishing players who try to heal at mid-range. Her phase two adds a spinning weapon art that covers a full 360-degree arc and summonable spirit projectiles that delay their attack for varied timing. Loretta's Greatbow spell creates delayed arrows that explode in an AoE, forcing players to dodge on sound rather than sight. The fight is more tactical than frantic — learning her patterns and punishing the recovery windows is more effective than aggressive chasing. Her arena on the Haligtree branches is narrow, adding fall risk.

Magma Wyrm Makar
Ruin-Strewn Precipice
Makar is an oversized magma wyrm blocking the alternate route to Altus Plateau. The fight follows the standard wyrm pattern — head slam, tail sweep, and magma breath that leaves burning pools on the ground. Makar's sword arm creates sweeping combos with the magma blade that can catch players who circle behind. The confined cave arena limits movement, and the magma pools reduce safe ground as the fight progresses. Stance-breaking Makar with heavy weapons creates long windows for damage, especially during the phase transition roar. The boss is most dangerous when backing up into a corner and spraying magma in a wide cone, forcing a choice between eating damage or running through fire.

Red Wolf of Radagon
Raya Lucaria Academy
The Red Wolf is a high-speed magic wolf that serves as a mid-boss for Raya Lucaria. Its attack pattern alternates between sorcery projectiles and aggressive melee combos, with minimal downtime between phases. The wolf creates glintstone swords that fire in rapid succession, then follows with a lunge-bite combo that covers the entire arena length. The fight rewards aggressive positioning since the wolf has low poise and staggers easily. Staying close denies most magic attacks and creates punish windows. The arena is a large library with pillars that can block projectiles but also limit roll escape routes. For magic users, this fight is a change of pace — closing distance is mandatory.

Margit, the Fell Omen
Stormhill (Gatefront)
Margit is most players' first major skill check in Elden Ring, and his delayed attacks are specifically designed to punish muscle memory from previous Souls games. Every swing has a wind-up that hangs longer than expected, then snaps forward at variable speed. His phase two adds a massive holy hammer and dagger combos that extend reach and damage output dramatically. The tail swipe punishes chuggers, and the grab attack deals massive damage with a cinematic follow-up. Margit can be tackled early, but most players benefit from exploring Limgrave and Weeping Peninsula first. Margit teaches the core lesson of Elden Ring combat: wait, watch, then roll.

Tree Sentinel
Limgrave (Church of Elleh)
The Tree Sentinel is the first field boss most players see, patrolling directly in front of the starting area. His mounted moveset includes shield bashes, halberd sweeps, and a charge attack that covers the entire clearing. The horse's mobility makes the Tree Sentinel a patient test of mounted combat or careful footwork. Players can delay this fight indefinitely and return overpowered, which is the intended design — the Tree Sentinel teaches that Elden Ring allows you to leave, explore, and come back stronger. Its attacks are well-telegraphed with generous windows, making it a fair introduction to mounted boss combat. Blocking is viable here since the damage is physical only.

Ancestor Spirit
Siofra River / Nokron
The Ancestor Spirit is one of Elden Ring's most visually stunning boss fights and also one of its easiest. The deer-like spirit moves gracefully with slow, well-telegraphed attacks that leave generous punish windows. Its firefly breath attack creates a short-range AoE that is easy to outspace. The spirit's health pool is modest, and its damage output is the lowest of any remembrance-style boss. The fight is more of an atmospheric experience than a combat challenge — the arena is a beautiful underground grove illuminated by ghostly blue lights. The Ancestor Spirit rewards patience and observation over aggression, and even under-leveled characters can defeat it on the first try.
Soldier of Godrick
Cave of Knowledge (Tutorial)
The Soldier of Godrick is the tutorial boss of Elden Ring, and by design, the easiest enemy in the game. He has a tiny health pool, three basic sword swings, and no phase transition. His attacks are slow, telegraphed, and deal minimal damage. A single charged heavy attack can stagger him for a critical hit that removes half his health bar. The Soldier serves purely as a combat tutorial to teach basic controls — light attack, heavy attack, dodge, and guard. Despite his meme status among the community as a put-upon punching bag, he fulfills his role perfectly. Every Tarnished starts their journey by defeating this poor soul in a dark cave.
Ranking Methodology
This ranking considers each boss at the point in the game where most players encounter them on a first playthrough, using solo no-summon combat as the baseline. The five evaluation criteria are moveset complexity (variety of attacks, timing tricks, phase transitions), damage output (how many hits to kill at appropriate vigor levels), health pool and defense (how long the fight lasts and how forgiving mistakes are), arena factors (terrain hazards, camera management, mobility restrictions), and the boss's role in teaching the player something about Elden Ring's combat systems. Field bosses and optional encounters are ranked alongside main story bosses to provide a complete picture of the game's difficulty curve.
Frequently Asked Questions
Who is the hardest boss in Elden Ring?
Malenia, Blade of Miquella is widely considered the hardest boss in Elden Ring due to her Waterfowl Dance combo, healing on each hit, and extremely aggressive second phase moveset. She requires precise dodge timing and high damage output to overcome.
How many remembrance bosses are in Elden Ring?
Elden Ring has 15 remembrance bosses including Malenia, Maliketh, Godfrey, Mohg, Radahn, Placidusax, Morgott, Fire Giant, Godrick, Rykard, Rennala, Fortissax, and others found throughout the Lands Between.
Which Elden Ring boss is the easiest?
The Soldier of Godrick in the Cave of Knowledge tutorial area is the easiest boss in Elden Ring. It serves as a basic combat tutorial with a simple moveset, low health pool, and forgiving damage output, designed to teach new players the fundamentals of boss fights.